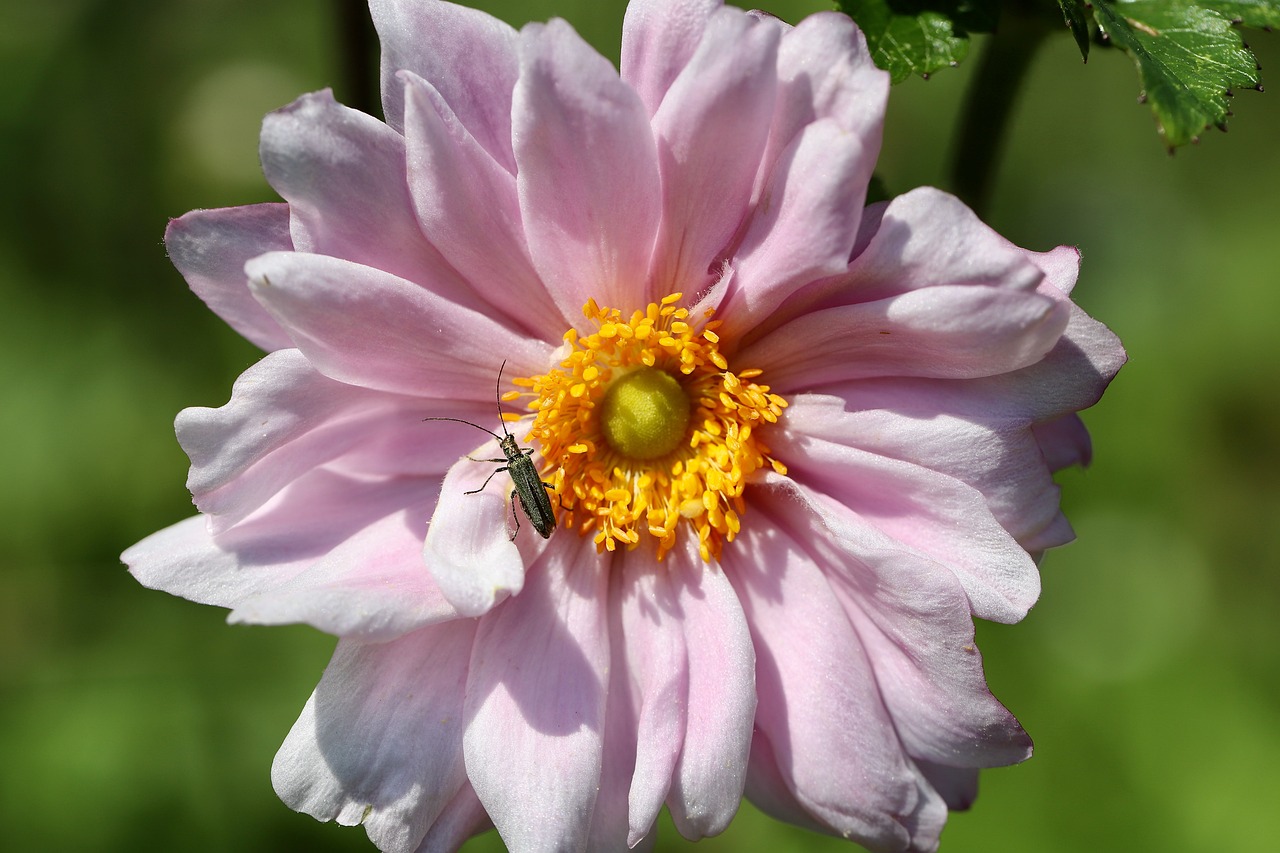

How to Plant and Store Calla Lily Rhizomes
Are you ready to bring the beauty of calla lilies into your garden or containers? This article will guide you through the process of planting and storing calla lily rhizomes, ensuring successful growth and maintenance. Whether you’re a seasoned gardener or a beginner, these step-by-step instructions will help you achieve stunning results.
First, let’s talk about planting calla lily rhizomes. It’s important to choose the right location for your calla lilies. These plants thrive in full sun or partial shade, so find a spot in your garden or containers that receives at least 6 hours of sunlight per day. Make sure the area has well-drained soil to prevent waterlogging, as calla lilies don’t like to sit in wet soil.
Once you’ve found the perfect location, it’s time to prepare the soil. Calla lilies prefer rich, fertile soil with a pH level between 6.0 and 6.5. If your soil is heavy or clay-like, you can amend it by adding organic matter such as compost or well-rotted manure. This will improve drainage and provide essential nutrients for the rhizomes.
To ensure optimal growth, it’s crucial to test the pH level of your soil. You can easily do this with a pH testing kit available at your local garden center. If the pH level is too low (acidic), you can raise it by adding lime. If it’s too high (alkaline), you can lower it by adding sulfur or peat moss. Maintaining the right pH level will create the ideal environment for your calla lilies to thrive.
Now that you’ve prepared the soil, it’s time to plant the calla lily rhizomes. Dig a hole that is about 4-6 inches deep and place the rhizome horizontally with the growing point facing up. Space the rhizomes about 12-18 inches apart to allow room for growth. Cover the rhizomes with soil and gently firm it around them.
Watering is essential for the initial establishment of calla lilies. Keep the soil evenly moist, but not waterlogged, until the plants are established. Once they are established, water them deeply once a week, allowing the top inch of soil to dry out between waterings. Mulching around the plants will help retain moisture and suppress weed growth.
Fertilizing calla lilies is important for promoting healthy growth and abundant blooms. Apply a balanced slow-release fertilizer in early spring and again in mid-summer. Be sure to follow the package instructions for application rates. Pruning is also beneficial to remove any dead or damaged foliage and to encourage new growth. Simply cut back the spent flowers and yellowing leaves to keep the plants looking their best.
When the dormant season arrives, it’s time to store your calla lily rhizomes properly. After the first frost, carefully dig up the rhizomes, taking care not to damage them. Gently shake off any excess soil and allow them to dry for a few days. Trim off any remaining foliage and place the rhizomes in a cool, dry location for storage.
Choosing the right storage location is crucial for the survival of your calla lily rhizomes. They should be stored in a dark, well-ventilated area with a temperature between 45°F and 55°F (7°C to 13°C). Avoid storing them near fruits or vegetables, as they release ethylene gas that can cause the rhizomes to rot.
When it comes to storage containers, you can use plastic bags, cardboard boxes, or breathable mesh bags. Just make sure the containers allow for proper air circulation. You can also place some vermiculite or dry peat moss in the containers to help maintain humidity and prevent the rhizomes from drying out.
In conclusion, planting and storing calla lily rhizomes requires careful attention to detail, but the rewards are well worth it. By following these step-by-step instructions and tips, you can enjoy the beauty of calla lilies in your garden year after year. So, get ready to embark on this exciting journey and watch your calla lilies flourish!
Choosing the Right Location
Choosing the right location is crucial for the successful growth of calla lilies. These beautiful flowers thrive in well-drained soil and require at least six hours of direct sunlight each day. When selecting a spot in your garden or containers, keep in mind that calla lilies prefer a location that is sheltered from strong winds.
Before planting, it is important to assess the soil conditions. Calla lilies prefer soil that is rich in organic matter and has a pH level between 6.0 and 6.5. If your soil is heavy or clay-like, consider improving its drainage by adding compost or other organic matter. This will help create a loose and fertile soil environment that promotes healthy root development.
When planting calla lilies in containers, choose pots that have drainage holes to prevent waterlogging. This will ensure that excess water can easily drain out and prevent root rot. Additionally, containers provide the flexibility to move the plants to different locations based on their sunlight requirements.
In summary, when choosing the right location for planting calla lilies, prioritize well-drained soil, adequate sunlight, and protection from strong winds. Assess and amend the soil if necessary, and consider using containers for added flexibility. By providing the ideal conditions, you can create a thriving environment for your calla lilies to flourish.
Preparing the Soil
Preparing the soil is a crucial step in ensuring the optimal growth and health of calla lily rhizomes. By providing the right conditions for the roots to thrive, you can expect beautiful blooms and healthy plants.
Here are some important soil preparation techniques to follow:
- Loosen the soil: Before planting calla lily rhizomes, it’s important to loosen the soil. This will help improve drainage and allow the roots to penetrate easily.
- Remove weeds: Clear the area of any weeds or grass that may compete with the calla lilies for nutrients and water.
- Amend the soil: Calla lilies prefer well-draining soil with a slightly acidic pH level. You can amend the soil by adding organic matter such as compost or well-rotted manure to improve its structure and fertility.
- Test the soil pH: It’s important to test the pH level of your soil to ensure it falls within the ideal range of 6.0 to 6.5. If the pH is too high or too low, you can adjust it by adding lime to raise the pH or sulfur to lower it.
- Provide adequate nutrients: Calla lilies require a balanced fertilizer rich in nitrogen, phosphorus, and potassium. Incorporate a slow-release fertilizer into the soil before planting to provide the necessary nutrients for healthy growth.
By following these soil preparation techniques, you can create an optimal environment for calla lily rhizomes to thrive and produce stunning flowers.
Amending the Soil
Amending the soil is a crucial step in ensuring the optimal growth and health of calla lily rhizomes. Soil amendment involves adding organic matter and nutrients to improve the soil’s fertility and structure. This process helps create a favorable environment for calla lilies to thrive and produce beautiful blooms.
Calla lilies require specific nutrients for their growth and development. They need a well-balanced fertilizer that provides essential elements like nitrogen, phosphorus, and potassium. Nitrogen promotes lush foliage, phosphorus stimulates root growth, and potassium enhances flower production. Additionally, calla lilies benefit from the addition of organic matter such as compost or well-rotted manure, which improves soil texture and nutrient availability.
To determine the specific nutrient requirements of your soil, it is recommended to conduct a soil test. A soil test will analyze the pH level and nutrient content of your soil, helping you identify any deficiencies or imbalances. Based on the test results, you can then amend the soil accordingly to meet the specific needs of calla lilies.
When amending the soil, it is essential to follow the recommended application rates for fertilizers and organic matter. Over-fertilization can lead to excessive foliage growth at the expense of blooms, while under-fertilization can result in weak and stunted plants. By providing the right amendments and nutrients, you can ensure that your calla lilies have the best possible conditions for thriving growth and abundant flowers.
Testing Soil pH
Testing the pH level of your soil is crucial for creating the ideal environment for calla lilies to thrive. The pH scale measures the acidity or alkalinity of the soil, and calla lilies prefer a slightly acidic to neutral pH level between 6.0 and 7.0.
To test the pH level of your soil, you can use a pH testing kit available at garden centers or use a pH meter. Follow the instructions provided with the kit or meter to obtain an accurate reading.
If the pH level of your soil is too acidic (below 6.0), you can raise it by adding lime or wood ash. These amendments will help neutralize the acidity and bring the pH level closer to the desired range. On the other hand, if the soil is too alkaline (above 7.0), you can lower the pH by adding elemental sulfur or organic matter like peat moss.
It’s important to adjust the soil pH before planting calla lilies to ensure they have the best conditions for growth. By testing and adjusting the pH level, you can create an ideal environment that allows calla lilies to absorb nutrients efficiently and thrive in your garden or containers.
Planting Calla Lily Rhizomes
Planting calla lily rhizomes is a crucial step in ensuring their successful growth and beautiful blooms. To plant calla lily rhizomes, follow these detailed instructions:
Choose a location that receives full or partial sunlight, as calla lilies thrive in bright conditions. Ensure that the soil is well-draining to prevent waterlogging, which can lead to root rot.
Before planting, prepare the soil by removing any weeds or debris. Loosen the soil using a garden fork or tiller to improve aeration and drainage.
Dig a hole that is approximately 4-6 inches deep. Make sure the hole is wide enough to accommodate the rhizome and allow for proper root growth.
Place the calla lily rhizome with the pointed end facing up into the hole. Gently cover the rhizome with soil, ensuring that the top is level with the ground surface.
Space the rhizomes approximately 12-18 inches apart to allow for proper air circulation and growth. This spacing also helps prevent overcrowding, which can lead to disease and stunted growth.
After planting, water the rhizomes thoroughly to settle the soil and provide moisture for initial root development. Maintain moist soil throughout the growing season, but avoid overwatering to prevent rot.
Apply a layer of organic mulch around the planted rhizomes to help retain moisture, suppress weed growth, and regulate soil temperature. Avoid placing mulch directly on top of the rhizomes to prevent rotting.
By following these planting techniques, you can ensure that your calla lily rhizomes have the best chance of thriving and producing stunning flowers.
Watering and Mulching
Watering and mulching are essential aspects of caring for calla lilies, as they directly impact their growth and overall health. Understanding the watering needs of calla lilies is crucial to ensure they receive the right amount of moisture without being overwatered or underwatered.
Calla lilies prefer consistently moist soil, but they also require good drainage to prevent waterlogging. A general rule of thumb is to water them deeply once a week, allowing the top inch of soil to dry out between waterings. However, the frequency may vary depending on factors such as temperature, humidity, and soil type.
Mulching plays a vital role in maintaining moisture levels and preventing weed growth around calla lilies. Applying a layer of organic mulch, such as wood chips or straw, around the base of the plants helps retain soil moisture, reduce evaporation, and suppress weed growth. Mulching also helps regulate soil temperature, keeping it cooler during hot summer months and warmer during colder periods.
When mulching, ensure the layer is about 2-3 inches thick and avoid piling it against the stems of the calla lilies, as this can promote rot and disease. Regularly check the moisture level of the soil and adjust watering accordingly, especially during hot and dry weather. By understanding the watering needs of calla lilies and the benefits of mulching, you can provide the optimal conditions for their growth and ensure their long-term health.
Fertilizing and Pruning
Fertilizing and pruning are essential practices to ensure the healthy growth and abundant blooms of calla lilies. By following the appropriate fertilization schedule and employing effective pruning techniques, you can provide the necessary nutrients and encourage optimal development in your calla lily plants.
When it comes to fertilizing calla lilies, it’s important to use a balanced fertilizer that provides a good mix of essential nutrients. A general rule of thumb is to apply fertilizer every four to six weeks during the growing season, which typically spans from spring to fall. However, it’s crucial to follow the instructions on the fertilizer packaging for specific dosage and application instructions.
Pruning is another crucial aspect of calla lily care. Regular pruning helps remove dead or damaged foliage, promotes airflow, and encourages the growth of new shoots and blooms. It’s recommended to prune calla lilies in early spring before the growing season begins. Start by removing any yellow or brown leaves, as well as any stems that appear weak or diseased. Additionally, you can trim back the spent flowers to encourage the development of new blooms.
Remember to always sterilize your pruning tools before and after use to prevent the spread of diseases. Clean the blades with a solution of one part bleach to nine parts water to ensure the tools are free from any harmful pathogens.
In summary, fertilizing and pruning are essential practices for promoting healthy growth and abundant blooms in calla lilies. By following a proper fertilization schedule and employing effective pruning techniques, you can provide the necessary nutrients and encourage optimal development in your calla lily plants. These practices will help you enjoy the beauty of vibrant and flourishing calla lilies in your garden or containers.
Storing Calla Lily Rhizomes
Storing calla lily rhizomes during the dormant season is crucial for their survival and future growth. Proper storage techniques will protect the rhizomes from rot and damage, ensuring that they remain healthy until the next planting season. Here are some important steps to follow when storing calla lily rhizomes:
- Harvesting and Cleaning: When the foliage of the calla lilies turns yellow and dies back, it is time to harvest the rhizomes. Carefully dig up the rhizomes using a garden fork or shovel, being careful not to damage them. Once harvested, gently clean off any excess soil and remove any dead or damaged parts.
- Choosing the Storage Location: The storage location should be cool, dark, and well-ventilated. A temperature between 40-50°F (4-10°C) is ideal for calla lily rhizomes. Avoid areas that are prone to extreme temperature fluctuations or high humidity, as this can cause the rhizomes to rot.
- Storage Containers and Medium: Select a suitable container for storing the rhizomes. It should have good drainage and be large enough to accommodate the rhizomes without overcrowding. You can use crates, cardboard boxes, or mesh bags. Fill the container with a suitable storage medium such as dry peat moss, vermiculite, or perlite. The medium should be slightly moist but not wet.
Place the cleaned and dried rhizomes in the container, making sure they are not touching each other. Cover the rhizomes with the storage medium, ensuring that they are completely surrounded. Close the container and label it with the variety of calla lily and the date of storage. Store the container in the chosen location, checking periodically to ensure that the rhizomes remain in good condition.
By following these storage guidelines, you can ensure the survival and future growth of your calla lily rhizomes. When the planting season arrives, you can retrieve the stored rhizomes and enjoy their beautiful blooms once again.
Harvesting and Cleaning
Knowing when and how to harvest calla lily rhizomes is crucial for their successful storage and future growth. Harvesting at the right time ensures that the rhizomes are mature and ready for storage. Typically, calla lily rhizomes are harvested in late fall or early winter, after the foliage has turned yellow or brown.
To harvest the rhizomes, start by gently digging around the base of the plant with a garden fork or shovel. Carefully lift the rhizomes out of the soil, taking care not to damage them. Shake off any excess soil and remove any dead or damaged parts.
Once the rhizomes have been harvested, it is important to clean and prepare them for storage. Start by gently rinsing the rhizomes with water to remove any remaining soil. Avoid using harsh chemicals or cleaners, as they can damage the rhizomes. After rinsing, let the rhizomes air dry for a few hours to ensure they are completely dry before storage.
After the rhizomes are dry, you can store them in a cool, dry place. It is recommended to use a storage medium such as peat moss, vermiculite, or dry sand to keep the rhizomes dry and prevent them from rotting. Place the rhizomes in a container or bag with the storage medium, making sure they are not touching each other. Store the rhizomes in a location with a temperature between 45-55°F (7-13°C) and low humidity.
By following these steps for harvesting and cleaning calla lily rhizomes, you can ensure their successful storage and future growth.
Choosing the Storage Location
Choosing the right storage location is crucial for the successful storage of calla lily rhizomes during the dormant season. The optimal conditions will help prevent rot and damage, ensuring the survival and future growth of the rhizomes. Here are some important factors to consider when selecting the storage location:
- Temperature: Calla lily rhizomes should be stored in a cool location with a temperature between 45°F and 55°F (7°C and 13°C). Avoid storing them in areas that are prone to extreme temperature fluctuations.
- Humidity: The storage location should have a moderate level of humidity, around 50% to 60%. Avoid areas that are too dry or too damp, as it can lead to rot or mold growth.
- Light: Calla lily rhizomes should be stored in a dark location to prevent them from sprouting prematurely. Exposure to light can trigger growth, which is not desirable during the dormant period.
- Air Circulation: Adequate air circulation is important to prevent the rhizomes from becoming too moist or developing fungal diseases. Avoid storing them in airtight containers or areas with poor ventilation.
It is also important to choose a storage location that is free from pests and rodents. These creatures can damage or consume the rhizomes, leading to their demise. Consider using pest control measures or storing the rhizomes in a secure location to prevent any unwanted visitors.
By following these guidelines, you can ensure that your calla lily rhizomes remain in optimal condition during the dormant season, ready to be planted and bloom beautifully when the time is right.
Storage Containers and Medium
When it comes to storing calla lily rhizomes during their dormant period, choosing the right containers and storage mediums is crucial. The containers should provide enough space for the rhizomes to breathe and prevent them from rotting. It’s recommended to use breathable containers such as mesh bags or paper bags, as they allow air circulation and reduce the risk of fungal growth.
Another important factor to consider is the storage medium. This refers to the material that surrounds the rhizomes during storage. One popular option is using peat moss or vermiculite as the storage medium. These materials help maintain moisture levels and provide insulation to protect the rhizomes from extreme temperatures.
If you prefer using containers instead of bags, you can opt for plastic containers with ventilation holes. These containers should be filled with the storage medium, ensuring that the rhizomes are covered but not completely buried.
To summarize, when storing calla lily rhizomes, choose breathable containers like mesh or paper bags, or plastic containers with ventilation holes. Use peat moss or vermiculite as the storage medium to maintain moisture levels and protect the rhizomes. Remember to check on the rhizomes periodically during the dormant period to ensure they are in good condition.
Frequently Asked Questions
- Q: What are the ideal conditions for planting calla lilies?
- Q: How do I prepare the soil for calla lily rhizomes?
- Q: Do calla lilies require specific nutrients?
- Q: How can I test the pH level of my soil?
- Q: What is the proper depth and spacing for planting calla lily rhizomes?
- Q: How often should I water calla lilies?
- Q: Should I mulch around calla lilies?
- Q: How do I store calla lily rhizomes during the dormant season?
- Q: When should I harvest calla lily rhizomes?
- Q: How do I choose the right storage location for calla lily rhizomes?
- Q: What type of containers and storage medium should I use for calla lily rhizomes?
A: Calla lilies thrive in well-draining soil with full sun or partial shade. They prefer temperatures between 60-75°F (15-24°C) and moderate humidity.
A: Start by loosening the soil to a depth of 8-10 inches (20-25 cm). Remove any weeds or debris and mix in compost or well-rotted manure to improve fertility and drainage.
A: Yes, calla lilies benefit from a balanced fertilizer high in phosphorus. Incorporating bone meal or a slow-release fertilizer into the soil before planting can provide the necessary nutrients.
A: You can use a soil testing kit or pH meter to determine the acidity or alkalinity of your soil. Calla lilies prefer a slightly acidic to neutral pH range of 6.0-7.0.
A: Plant calla lily rhizomes about 4-6 inches (10-15 cm) deep and space them 12-18 inches (30-45 cm) apart. Ensure the pointed end faces up and cover them with soil.
A: Water calla lilies regularly to keep the soil evenly moist, but not waterlogged. Aim for about 1 inch (2.5 cm) of water per week, adjusting based on rainfall and temperature.
A: Yes, applying a layer of organic mulch around calla lilies helps retain moisture, suppress weeds, and regulate soil temperature. Use materials like straw, wood chips, or shredded leaves.
A: After the foliage dies back, carefully dig up the rhizomes, remove excess soil, and let them dry for a few days. Store them in a cool, dry place in paper bags or breathable containers.
A: Wait until the foliage has completely yellowed and died back before harvesting calla lily rhizomes. This usually occurs in late fall or early winter.
A: Select a dark, well-ventilated area with a consistent temperature of around 50-60°F (10-15°C). Avoid storing them near fruits or vegetables that release ethylene gas, as it can cause damage.
A: Use breathable containers like paper bags or mesh bags to store calla lily rhizomes. Fill the containers with a dry medium such as peat moss, vermiculite, or sawdust to prevent moisture buildup.
Related Posts

The History and Culture of Orchids

The Best Lily of the Valley Varieties for Your Garden